To continue installing WordPress on Docker Securely, we need to tackle the next component. With Docker installed and ready to go, the next step in our deployment process is setting up Traefik as our dynamic reverse proxy and load balancer. Traefik will manage the routing of incoming traffic to our WordPress containers, handle SSL termination to ensure secure communication and provide seamless scalability. In this section, we’ll guide you through configuring and deploying Traefik in your Docker environment, ensuring that it efficiently and securely directs traffic to your WordPress instances.
Configuring Traefik
The commands below set up the necessary directory structure and configuration files for deploying Traefik. The data subdirectory holds 3 main files to configure Traefik, acme.json will dynamically store the SSL certs, traefik.yml, is the main configuration file for redirection services and for obtaining SSL certificates, and config.yml for any additional configurations.
mkdir traefik
cd traefik
mkdir data
cd data
touch acme.json
chmod 600 acme.json
touch traefik.yml
touch config.yml
Create a docker network named proxy to contain the stack of containers:
docker network create proxyBack out of the data directory to the main traefik directory. Now you will create your docker-compose.yml file that will deploy the Traefik container.
nano docker-compose.ymlHere is an example of what to put in your docker-compose.yml file. Starting with services, you will identify your Traefik image. I used the latest version of 3.0 available. I used traefik:latest previously but it pulled version 2.x so I specified 3.0.0 directly.
The parts you want to focus on are the name of your container, the environment section, and the labels section.
services:
  traefik:
    image: traefik:3.0.0
    container_name: traefik
    restart: unless-stopped
    security_opt:
      - no-new-privileges:true
    networks:
      - proxy
    ports:
      - 80:80
      - 443:443
    environment:
      - CF_DNS_API_TOKEN=YOUR_API_TOKEN
      # If you choose to use an API Key instead of a Token, specify your email as well
      # - [email protected]
      # - CF_API_KEY=YOUR_API_KEY
    volumes:
      - /etc/localtime:/etc/localtime:ro
      - /var/run/docker.sock:/var/run/docker.sock:ro
      - /home/username/traefik/data/traefik.yml:/traefik.yml:ro
      - /home/username/traefik/data/acme.json:/acme.json
      - /home/username/traefik/data/config.yml:/config.yml:ro
    labels:
      - "traefik.enable=true"
      - "traefik.http.routers.traefik.entrypoints=http"
      - "traefik.http.routers.traefik.rule=Host(`traefik-dashboard.example.com`)"
      - "traefik.http.middlewares.traefik-auth.basicauth.users=USER:BASIC_AUTH_PASSWORD"
      - "traefik.http.middlewares.traefik-https-redirect.redirectscheme.scheme=https"
      - "traefik.http.middlewares.sslheader.headers.customrequestheaders.X-Forwarded-Proto=https"
      - "traefik.http.routers.traefik.middlewares=traefik-https-redirect"
      - "traefik.http.routers.traefik-secure.entrypoints=https"
      - "traefik.http.routers.traefik-secure.rule=Host(`traefik-dashboard.example.com`)"
      - "traefik.http.routers.traefik-secure.middlewares=traefik-auth"
      - "traefik.http.routers.traefik-secure.tls=true"
      - "traefik.http.routers.traefik-secure.tls.certresolver=cloudflare"
      - "traefik.http.routers.traefik-secure.tls.domains[0].main=example.com"
      - "traefik.http.routers.traefik-secure.tls.domains[0].sans=*.example.com"
      - "traefik.http.routers.traefik-secure.service=api@internal"

networks:
  proxy:
    external: true
To obtain SSL certificates from Let’s Encrypt, you will need to verify that you own the domain name(s) that you plan to use for your WordPress site. To verify ownership, you can use DNS Validation. I use CloudFlare in this example. If you don’t use CloudFlare, you will need to research the DNS service you use. Under the environment section, you will need to enter your API token from CloudFlare.
Let’s get a new token from Cloudflare.
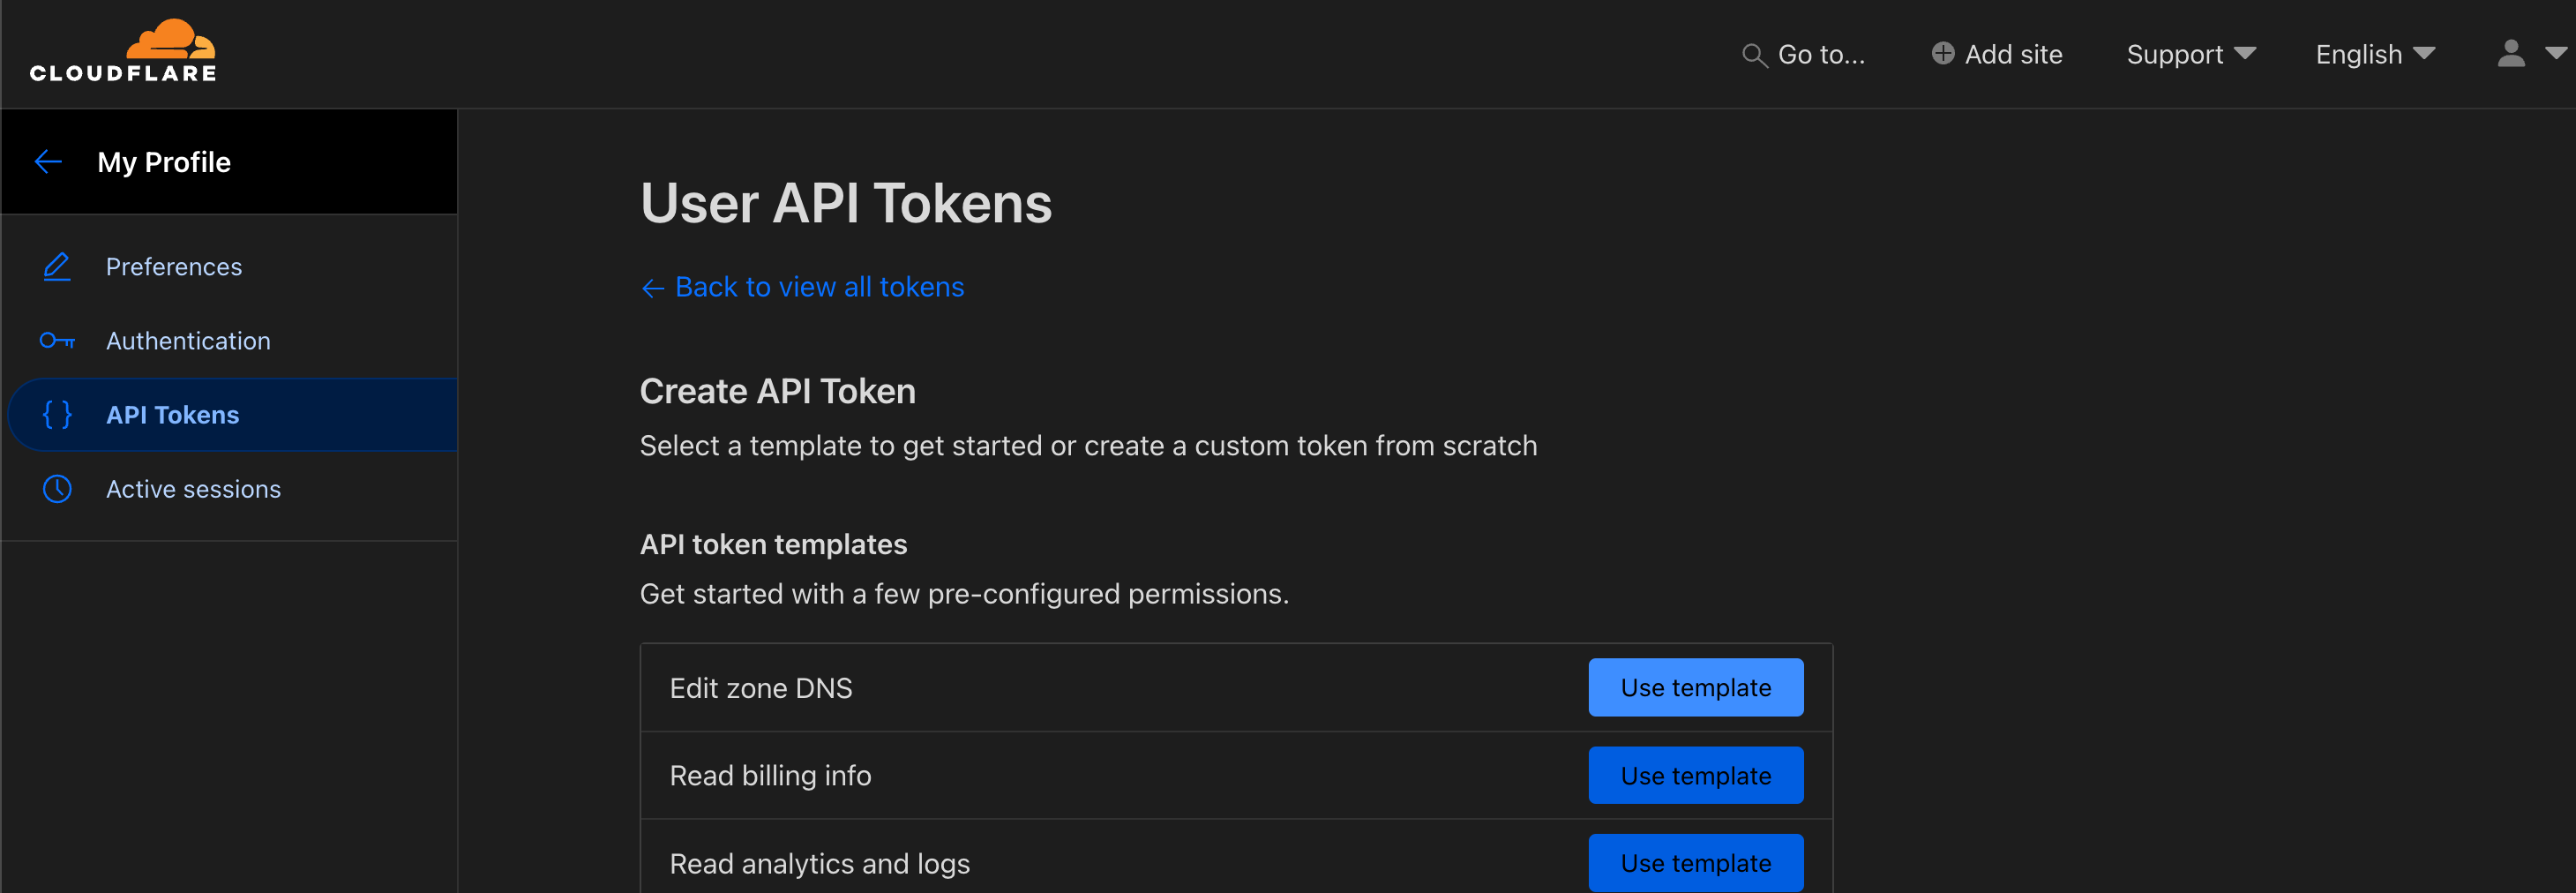
Navigate to your domain name and choose Get API Token. Then choose Create Token.

Choose Edit zone DNS template. This will allow Traefik to read the DNS information via the API.

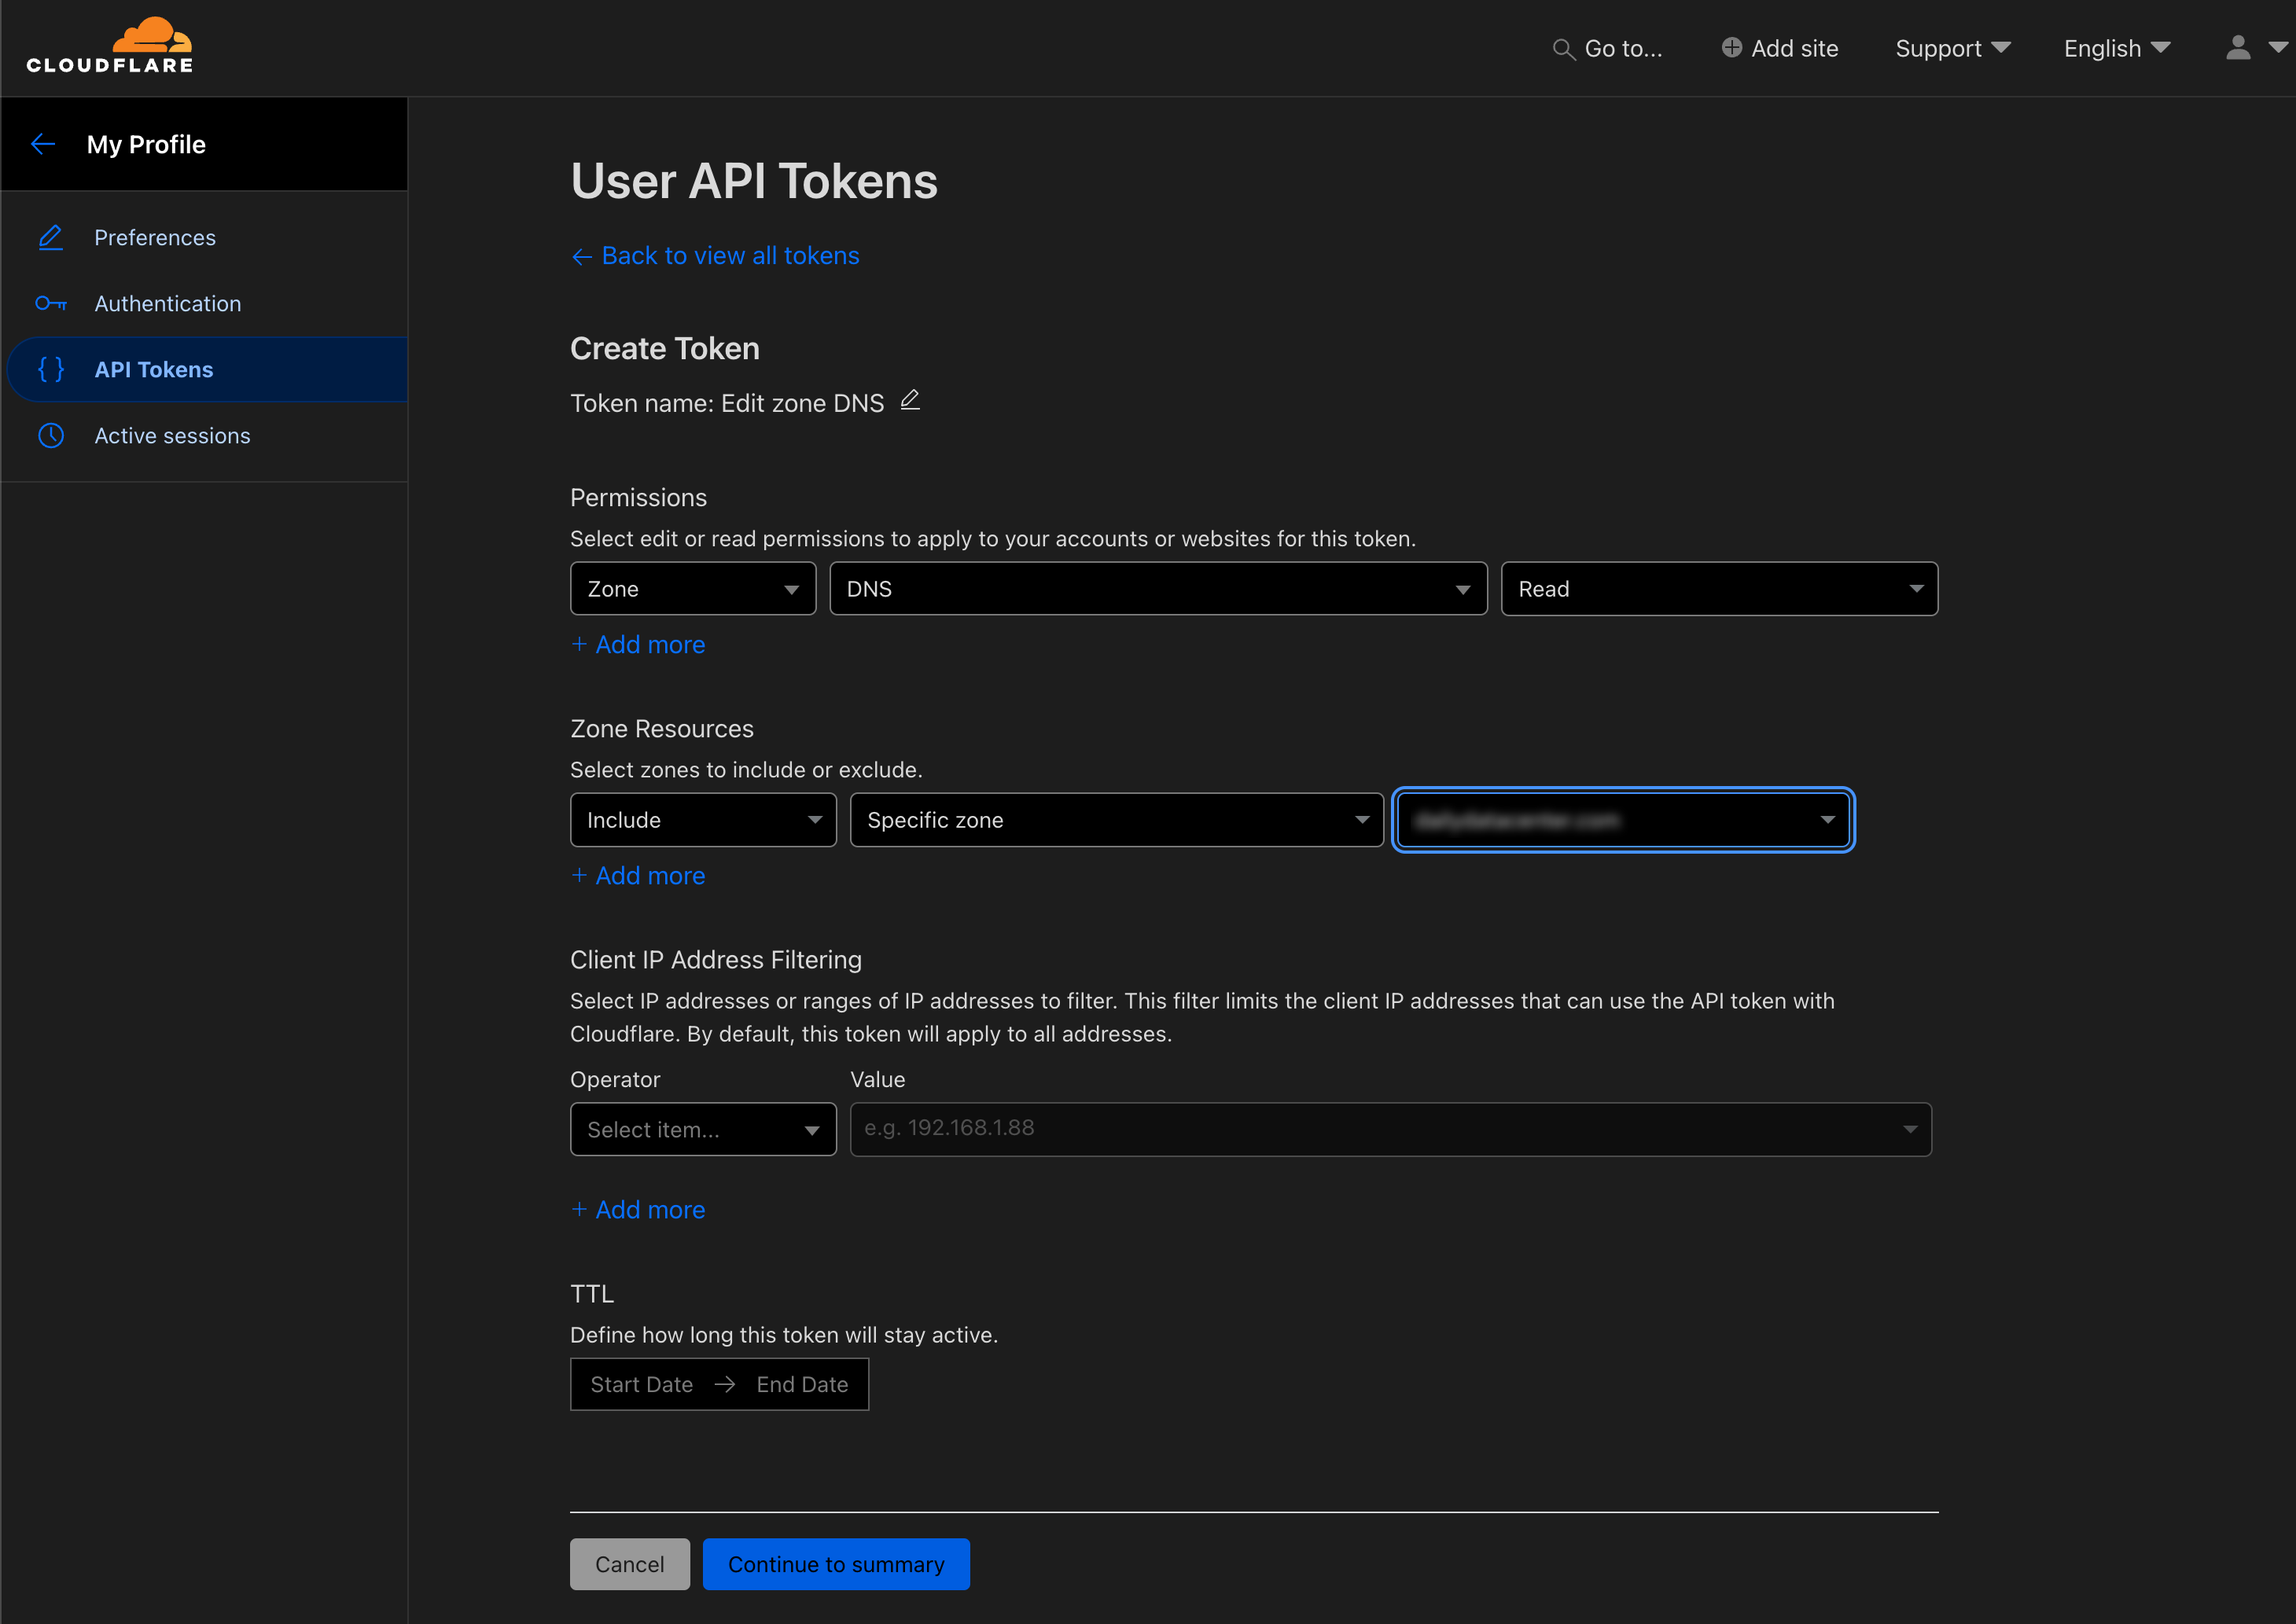
Set the permissions to Zone -> DNS -> Read. Set the Zone Resources Include -> Specific zone -> your domain. Set any IP filtering you may want and finally set a TTL if you wish.

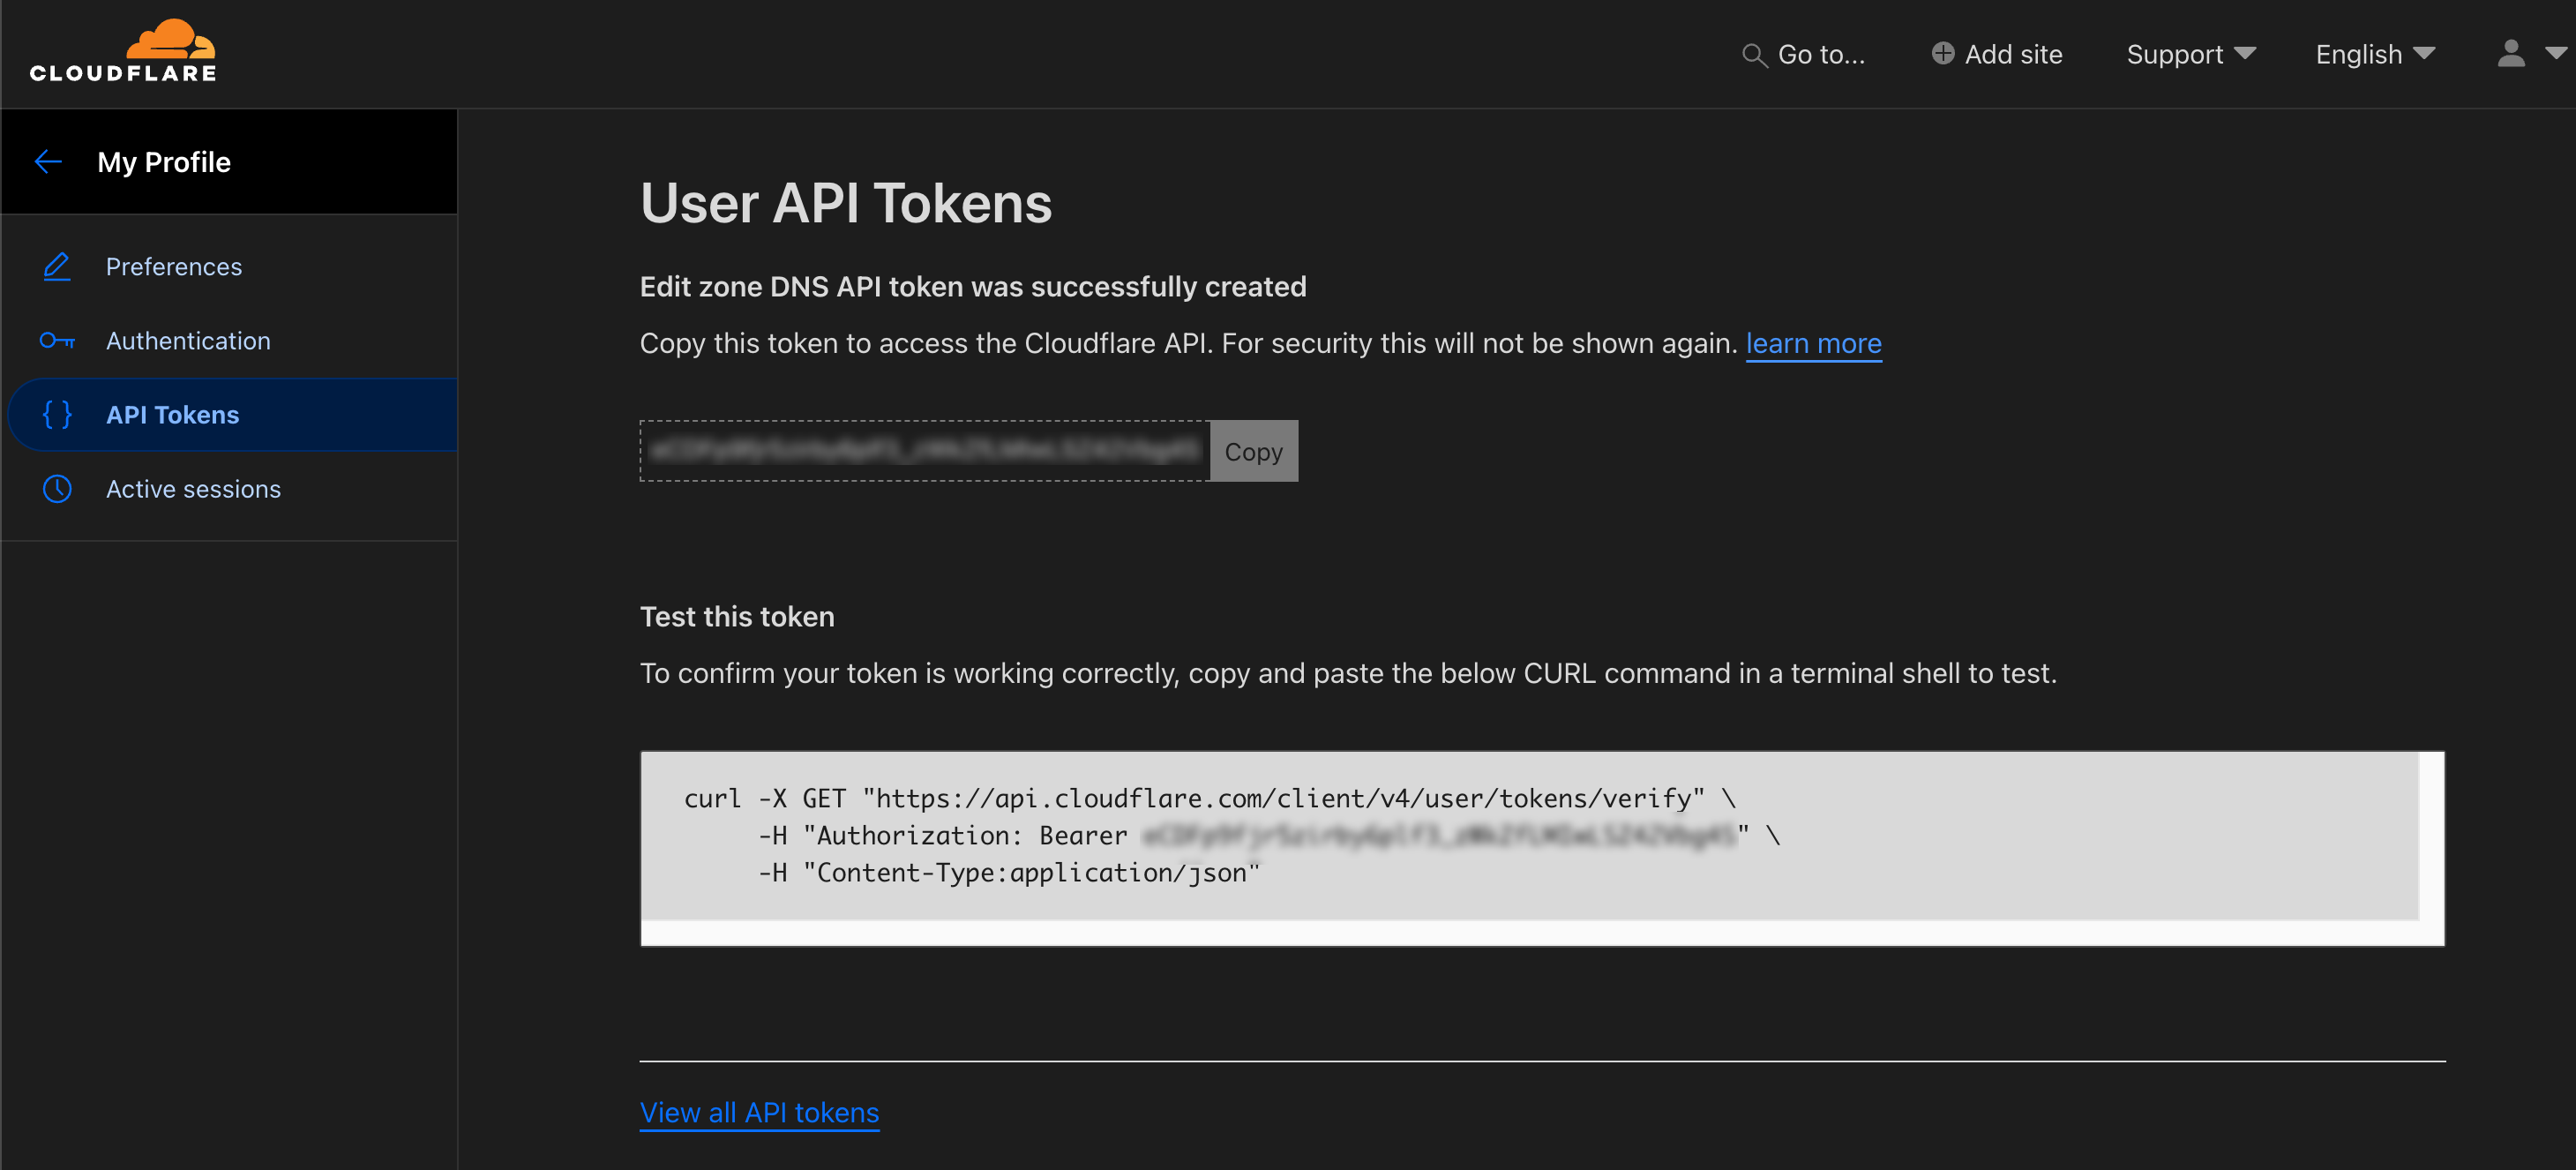
Finally, copy all the Token information to a secure place to be used in your Traefik configuration.

Now, let’s take a look and the Labels section in our docker-compose.yml file. The Labels section in Docker provides a way to add metadata to containers, which Traefik can use to configure routing rules, middleware, and SSL settings dynamically. Here’s a detailed breakdown of each label in the provided example:
Enable Traefik. This label tells Traefik to manage this container. Without this label, Traefik will ignore the container entirely.
- "traefik.enable=true"
...
These labels define an HTTP router named traefik:
- EntryPoint: Specifies that this router listens on the
httpentrypoint. - Rule: Uses a host rule to route traffic to
traefik-dashboard.example.com.
...
- "traefik.http.routers.traefik.entrypoints=http"
- "traefik.http.routers.traefik.rule=Host(`traefik-dashboard.example.com`)"
...
This sets up a basic authentication middleware named traefik-auth:
- BasicAuth: Protects the route with a username (
USER) and a base64-encoded password (BASIC_AUTH_PASSWORD).
To create an encoded password, check out this post from dev.to – Basic HTTP authentication in Traefik 2
...
- "traefik.http.middlewares.traefik-auth.basicauth.users=USER:BASIC_AUTH_PASSWORD"
...
These labels create a middleware to enforce HTTPS:
- RedirectScheme: Redirects HTTP traffic to HTTPS.
- Headers: Sets the
X-Forwarded-Protoheader tohttpsto indicate that the request was forwarded using HTTPS.
...
- "traefik.http.middlewares.traefik-https-redirect.redirectscheme.scheme=https"
- "traefik.http.middlewares.sslheader.headers.customrequestheaders.X-Forwarded-Proto=https"
...
This label attaches the HTTPS redirect middleware to the HTTP router.
...
- "traefik.http.routers.traefik.middlewares=traefik-https-redirect"
...
These labels define a secure HTTPS router named traefik-secure:
- EntryPoint: Specifies that this router listens on the
httpsentrypoint. - Rule: Routes traffic to
traefik-dashboard.local.example.com. - Middleware: Applies the
traefik-authmiddleware for basic authentication. - TLS: Enables TLS for this router.
- CertResolver: Uses the
cloudflareresolver to obtain SSL certificates. - Domains: Specifies the primary domain (
local.example.com) and a wildcard domain (*.local.example.com) for the certificates.
...
- "traefik.http.routers.traefik-secure.entrypoints=https"
- "traefik.http.routers.traefik-secure.rule=Host(`traefik-dashboard.example.com`)"
- "traefik.http.routers.traefik-secure.middlewares=traefik-auth"
- "traefik.http.routers.traefik-secure.tls=true"
- "traefik.http.routers.traefik-secure.tls.certresolver=cloudflare"
- "traefik.http.routers.traefik-secure.tls.domains[0].main=example.com"
- "traefik.http.routers.traefik-secure.tls.domains[0].sans=*.example.com"
...
Finally, this label points the secure router to the Traefik internal API service, enabling access to the Traefik dashboard and API.
...
- "traefik.http.routers.traefik-secure.service=api@internal"
To finish up our docker-compose.yml file, we need to define the network that Traefik will be attached to.
networks:
  proxy:
    external: true
Creating the traefik.yml File
The traefik.yml file configures a Traefik reverse proxy, defining its entry points (ports), providers (e.g., Docker, file), and middleware. It sets up routing rules, SSL certificates, and logging preferences. This file essentially tells Traefik how to handle incoming traffic, manage services, and route requests to the appropriate backend services, ensuring secure and efficient load balancing and traffic management for your applications.
Here is a standard configuration. Note that the 2 other files, config.yml, and acme.json are referenced here. Also, if you are using another DNS service other than Cloudflare, you will need to change the certificatesResolvers section to suit your service provider.
api:
  dashboard: true
  debug: true
entryPoints:
  http:
    address: ":80"
    http:
      redirections:
        entryPoint:
          to: https
          scheme: https
  https:
    address: ":443"
serversTransport:
  insecureSkipVerify: true
providers:
  docker:
    endpoint: "unix:///var/run/docker.sock"
    exposedByDefault: false
  file:
    filename: /config.yml
certificatesResolvers:
  cloudflare:
    acme:
      email: [email protected]
      storage: acme.json
      dnsChallenge:
        provider: cloudflare
        #disablePropagationCheck: true # uncomment this if you have issues pulling certificates through cloudflare, By setting this flag to true disables the need to wait for the propagation of the TXT record to all authoritative name servers.
        #delayBeforeCheck: 60s # uncomment along with disablePropagationCheck if needed to ensure the TXT record is ready before verification is attempted
        resolvers:
          - "1.1.1.1:53"
          - "1.0.0.1:53"
Let’s fire up the Traefik container.
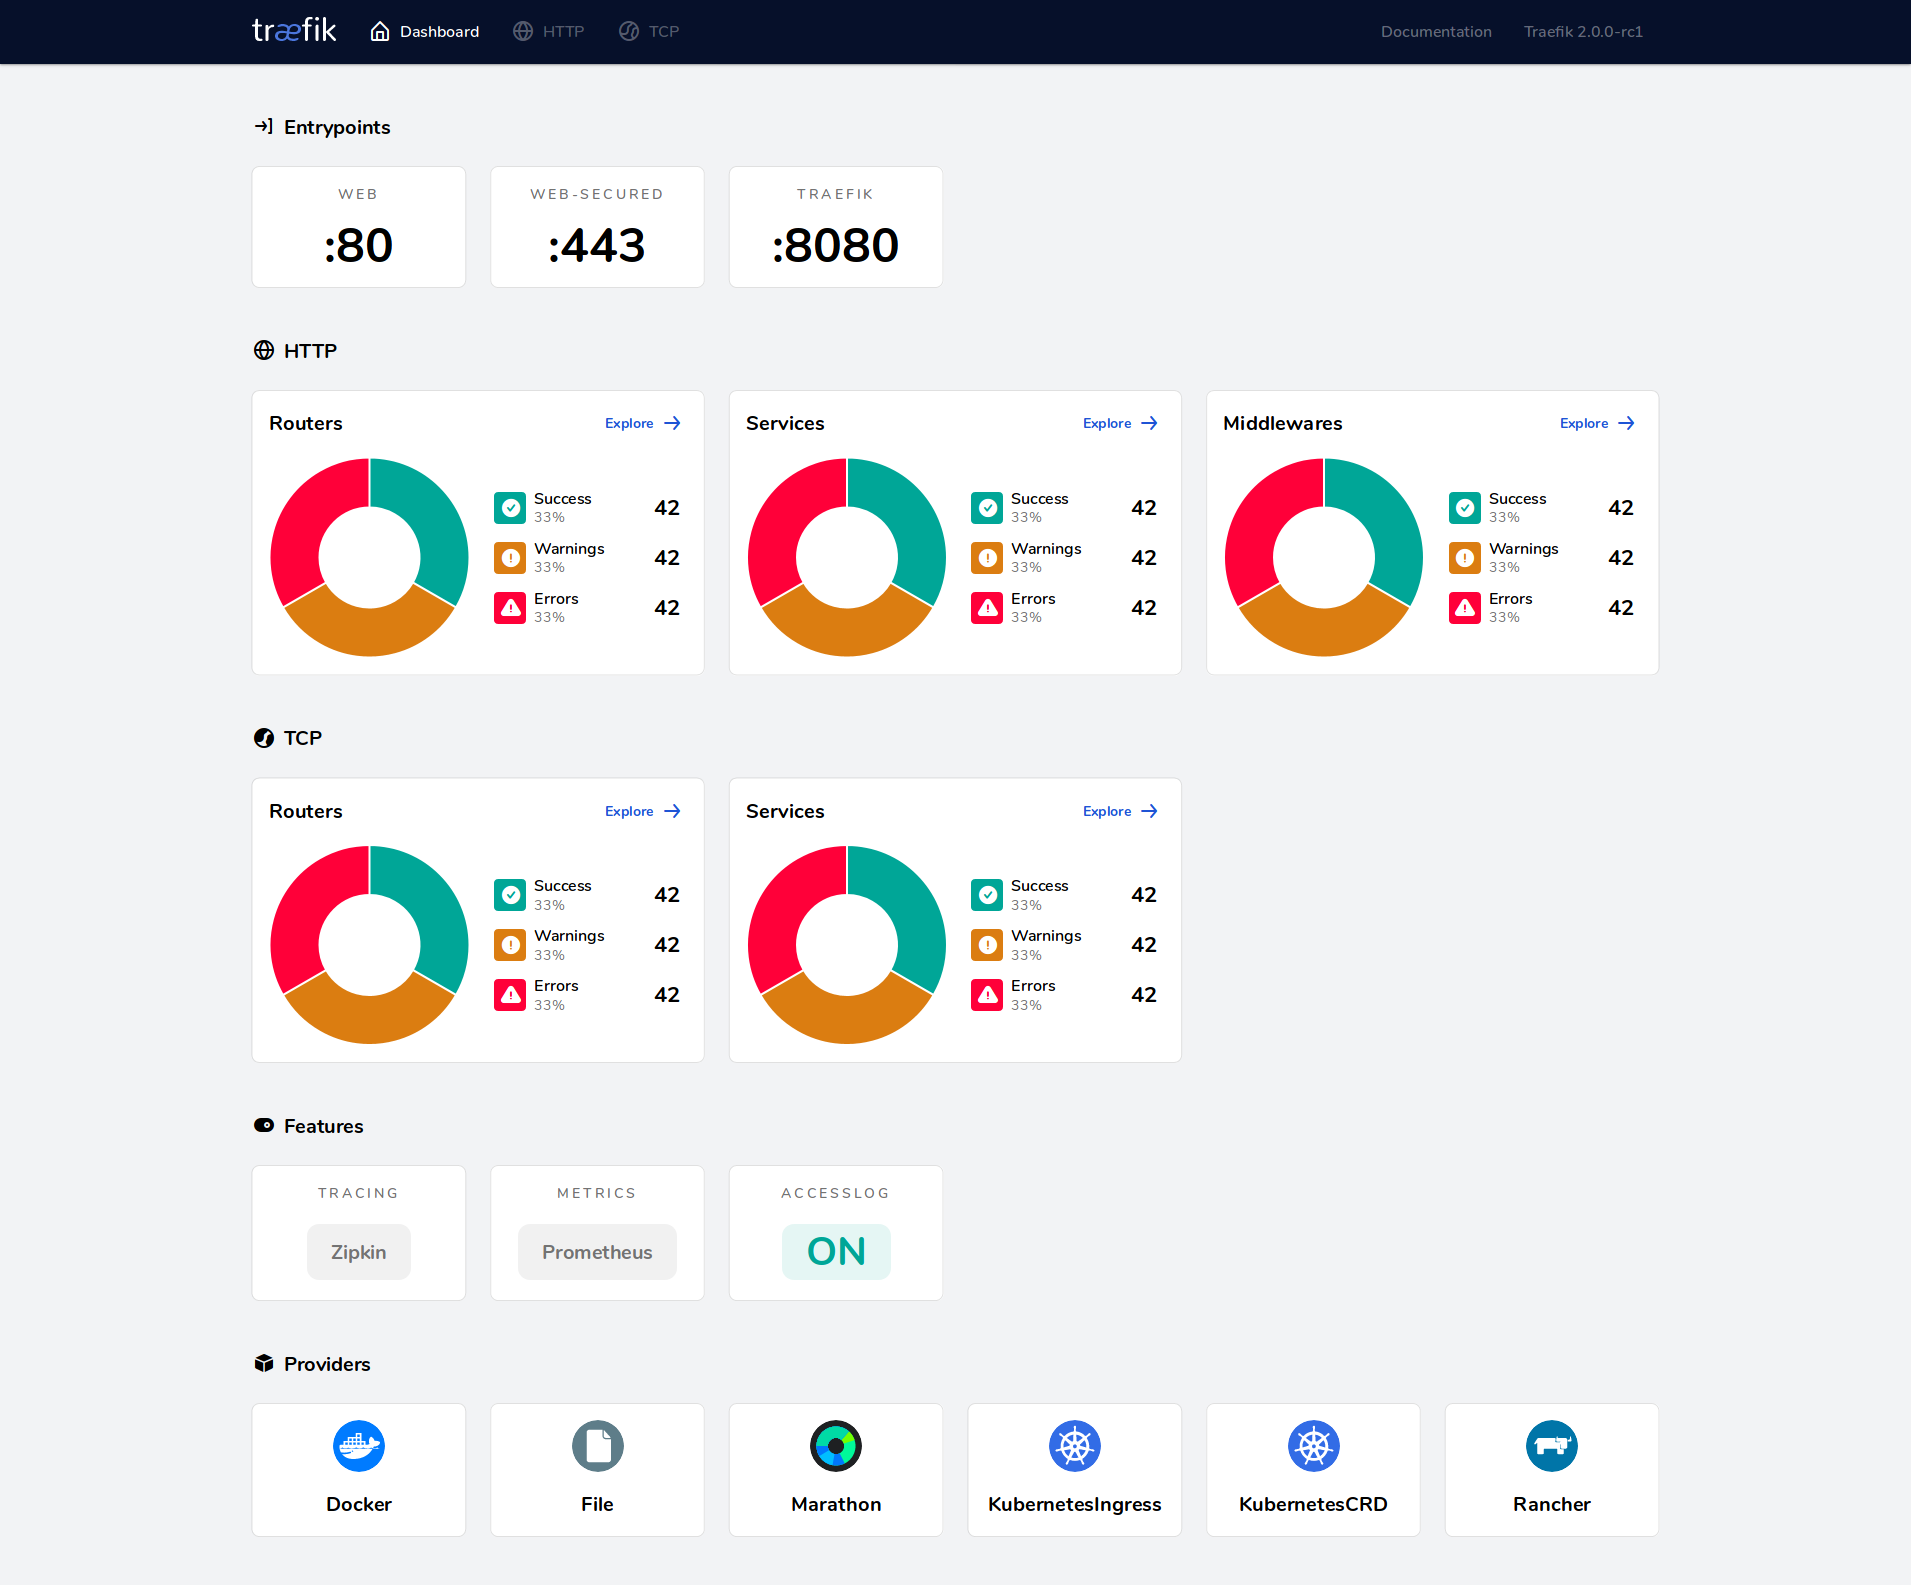
docker-compose up -dMake sure your internal DNS is pointing traefik-dashboard.example.com to your docker host. If all things are running correctly, you should see the dashboard.

After installing Docker and Traefik, the next step is to set up the WordPress stack. Check out part 3 of this series to deploy WordPress on Docker securely.
If you missed part 1 of this series go to Deploy WordPress with Docker, Traefik, and CrowdSec for Enhanced Security – Part 1
